Menus
Menus are your site's navigation. Build them in Appearance → Menu Manage, then assign one as your default navigation. uLanding supports normal dropdown menus and large mega menus.
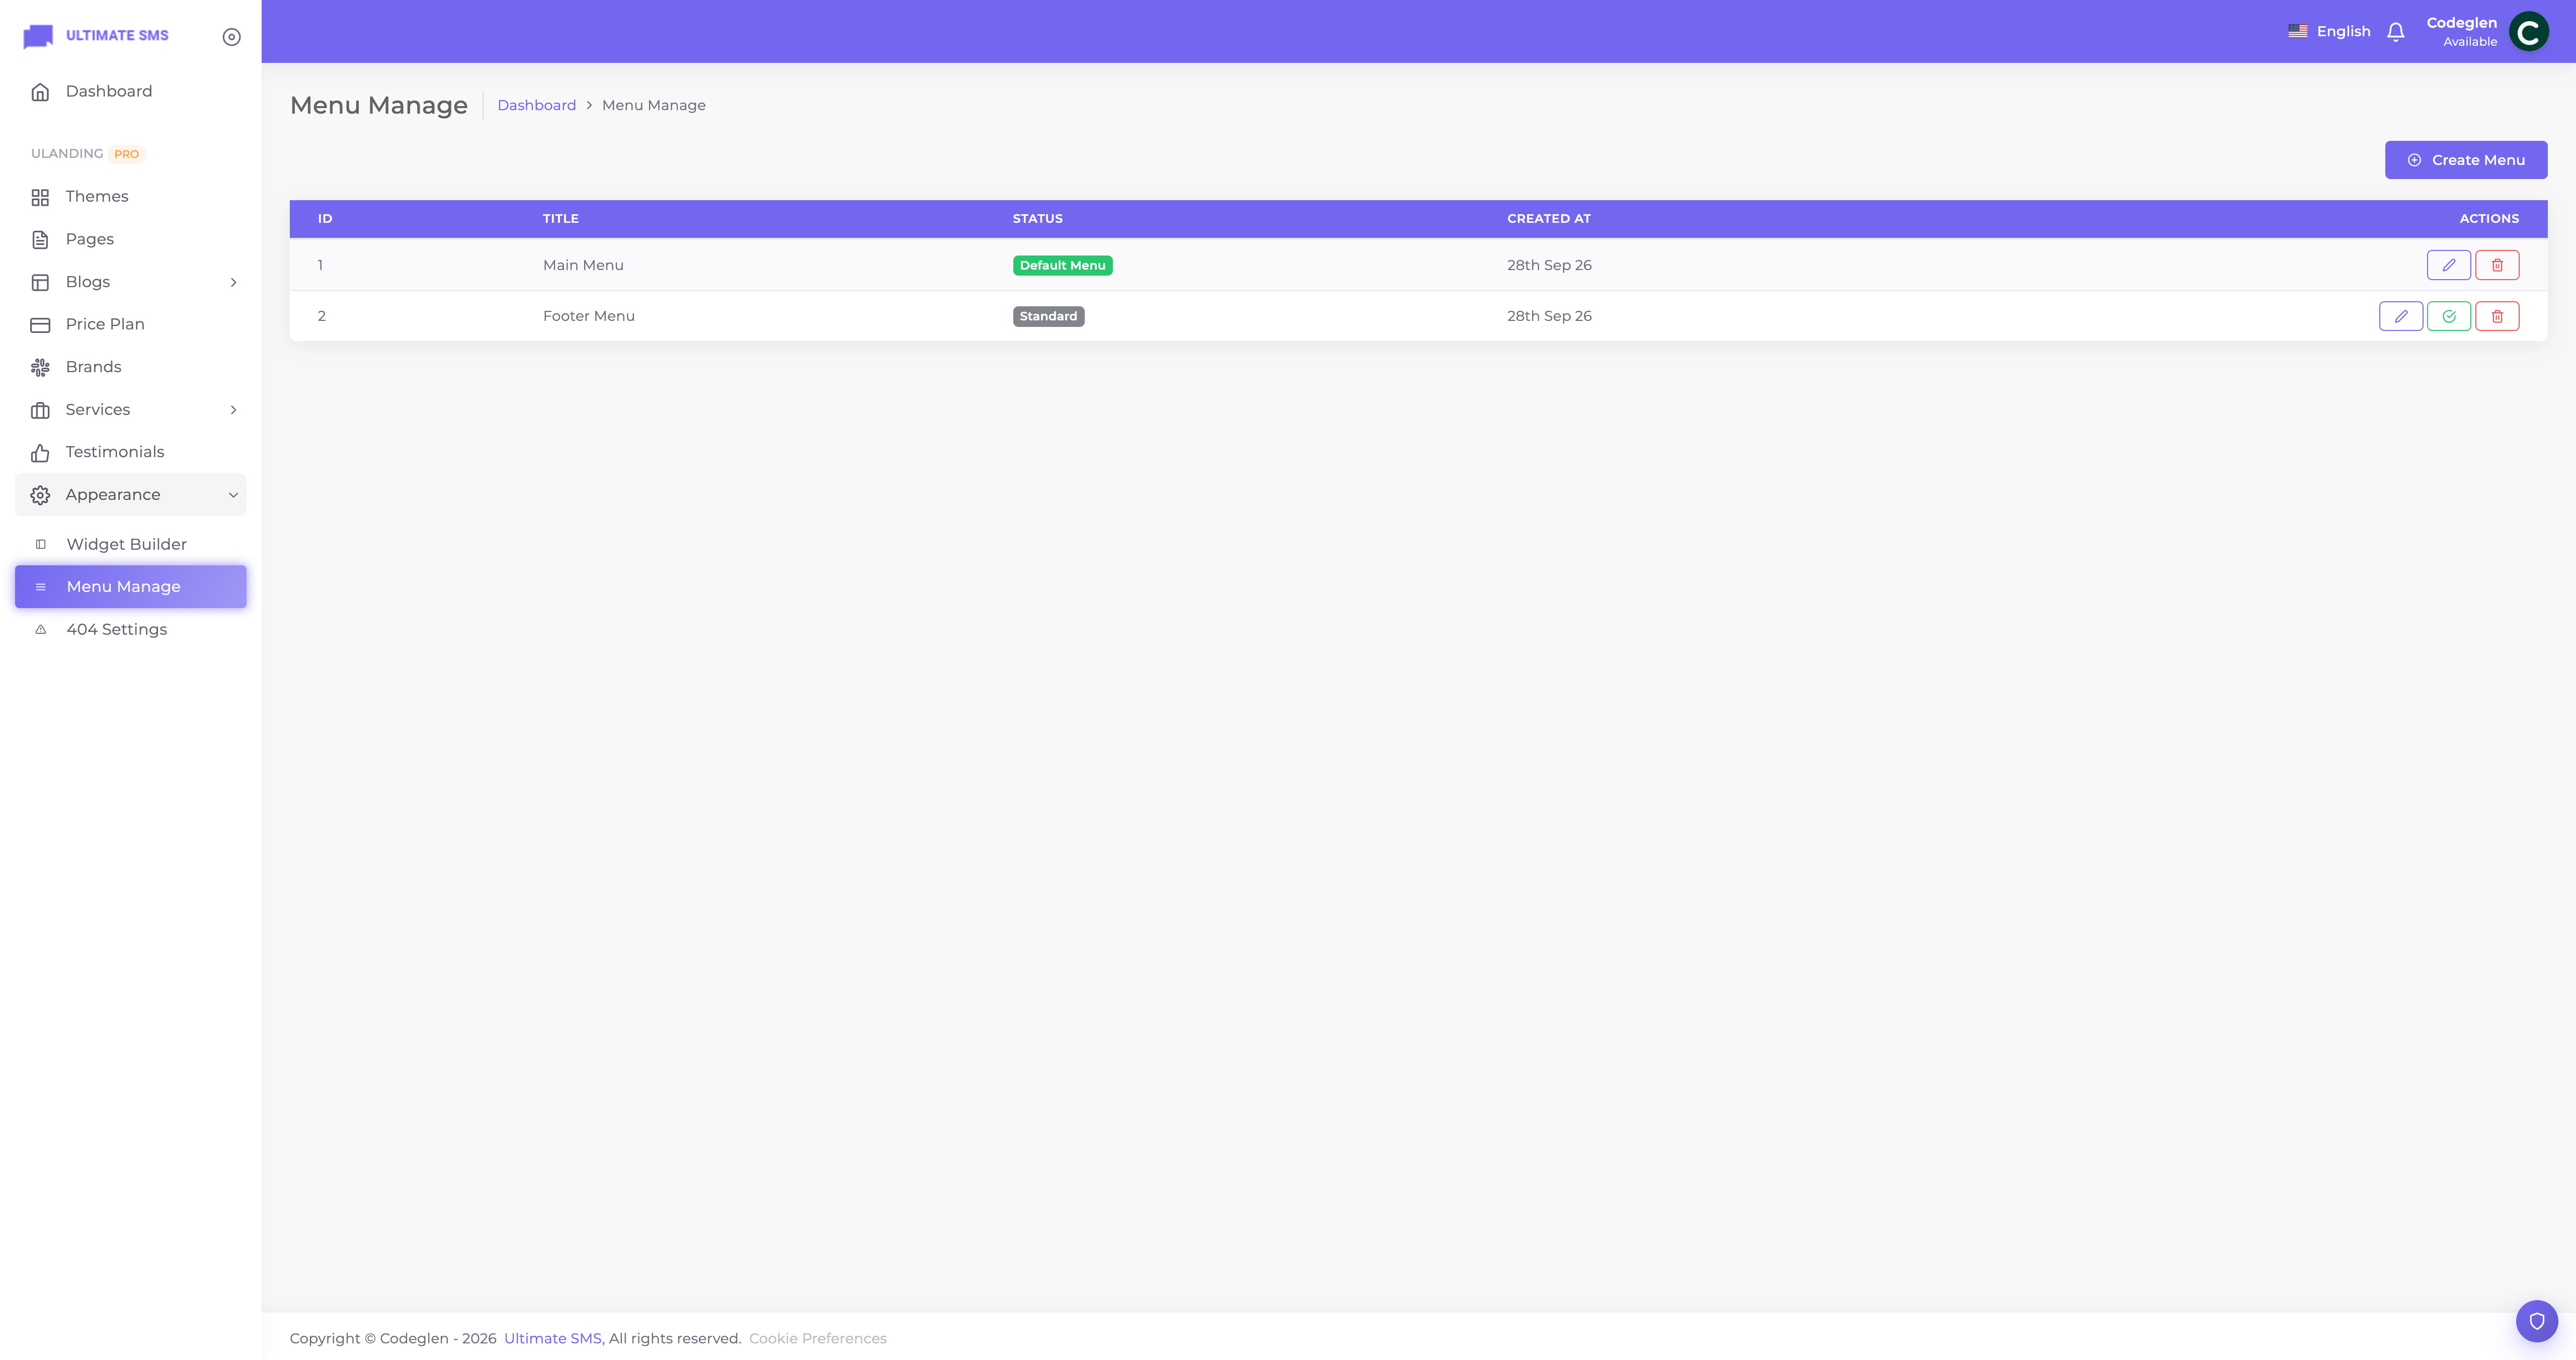
Screenshot: Menu Manage editor
Creating a menu
- Go to Appearance → Menu Manage.
- Click Create and give the menu a title (e.g. "Main Menu").
- The first menu you create becomes the default automatically.
You can have several menus (e.g. Main Menu, Footer Menu) and choose which is the default.
Adding items to a menu
Open a menu to edit it. There are two ways to add items:
Add pages
- Tick the pages you want from the list.
- Click Add — they become menu items linking to those pages.
Add a custom link
- Enter a URL, link text and target (same tab or new tab).
- Click Add.
Arranging the menu (drag & drop)
- Reorder items by dragging them up or down.
- Nest items by dragging one slightly under another to create a dropdown (parent → child).
- Changes to the structure save automatically.
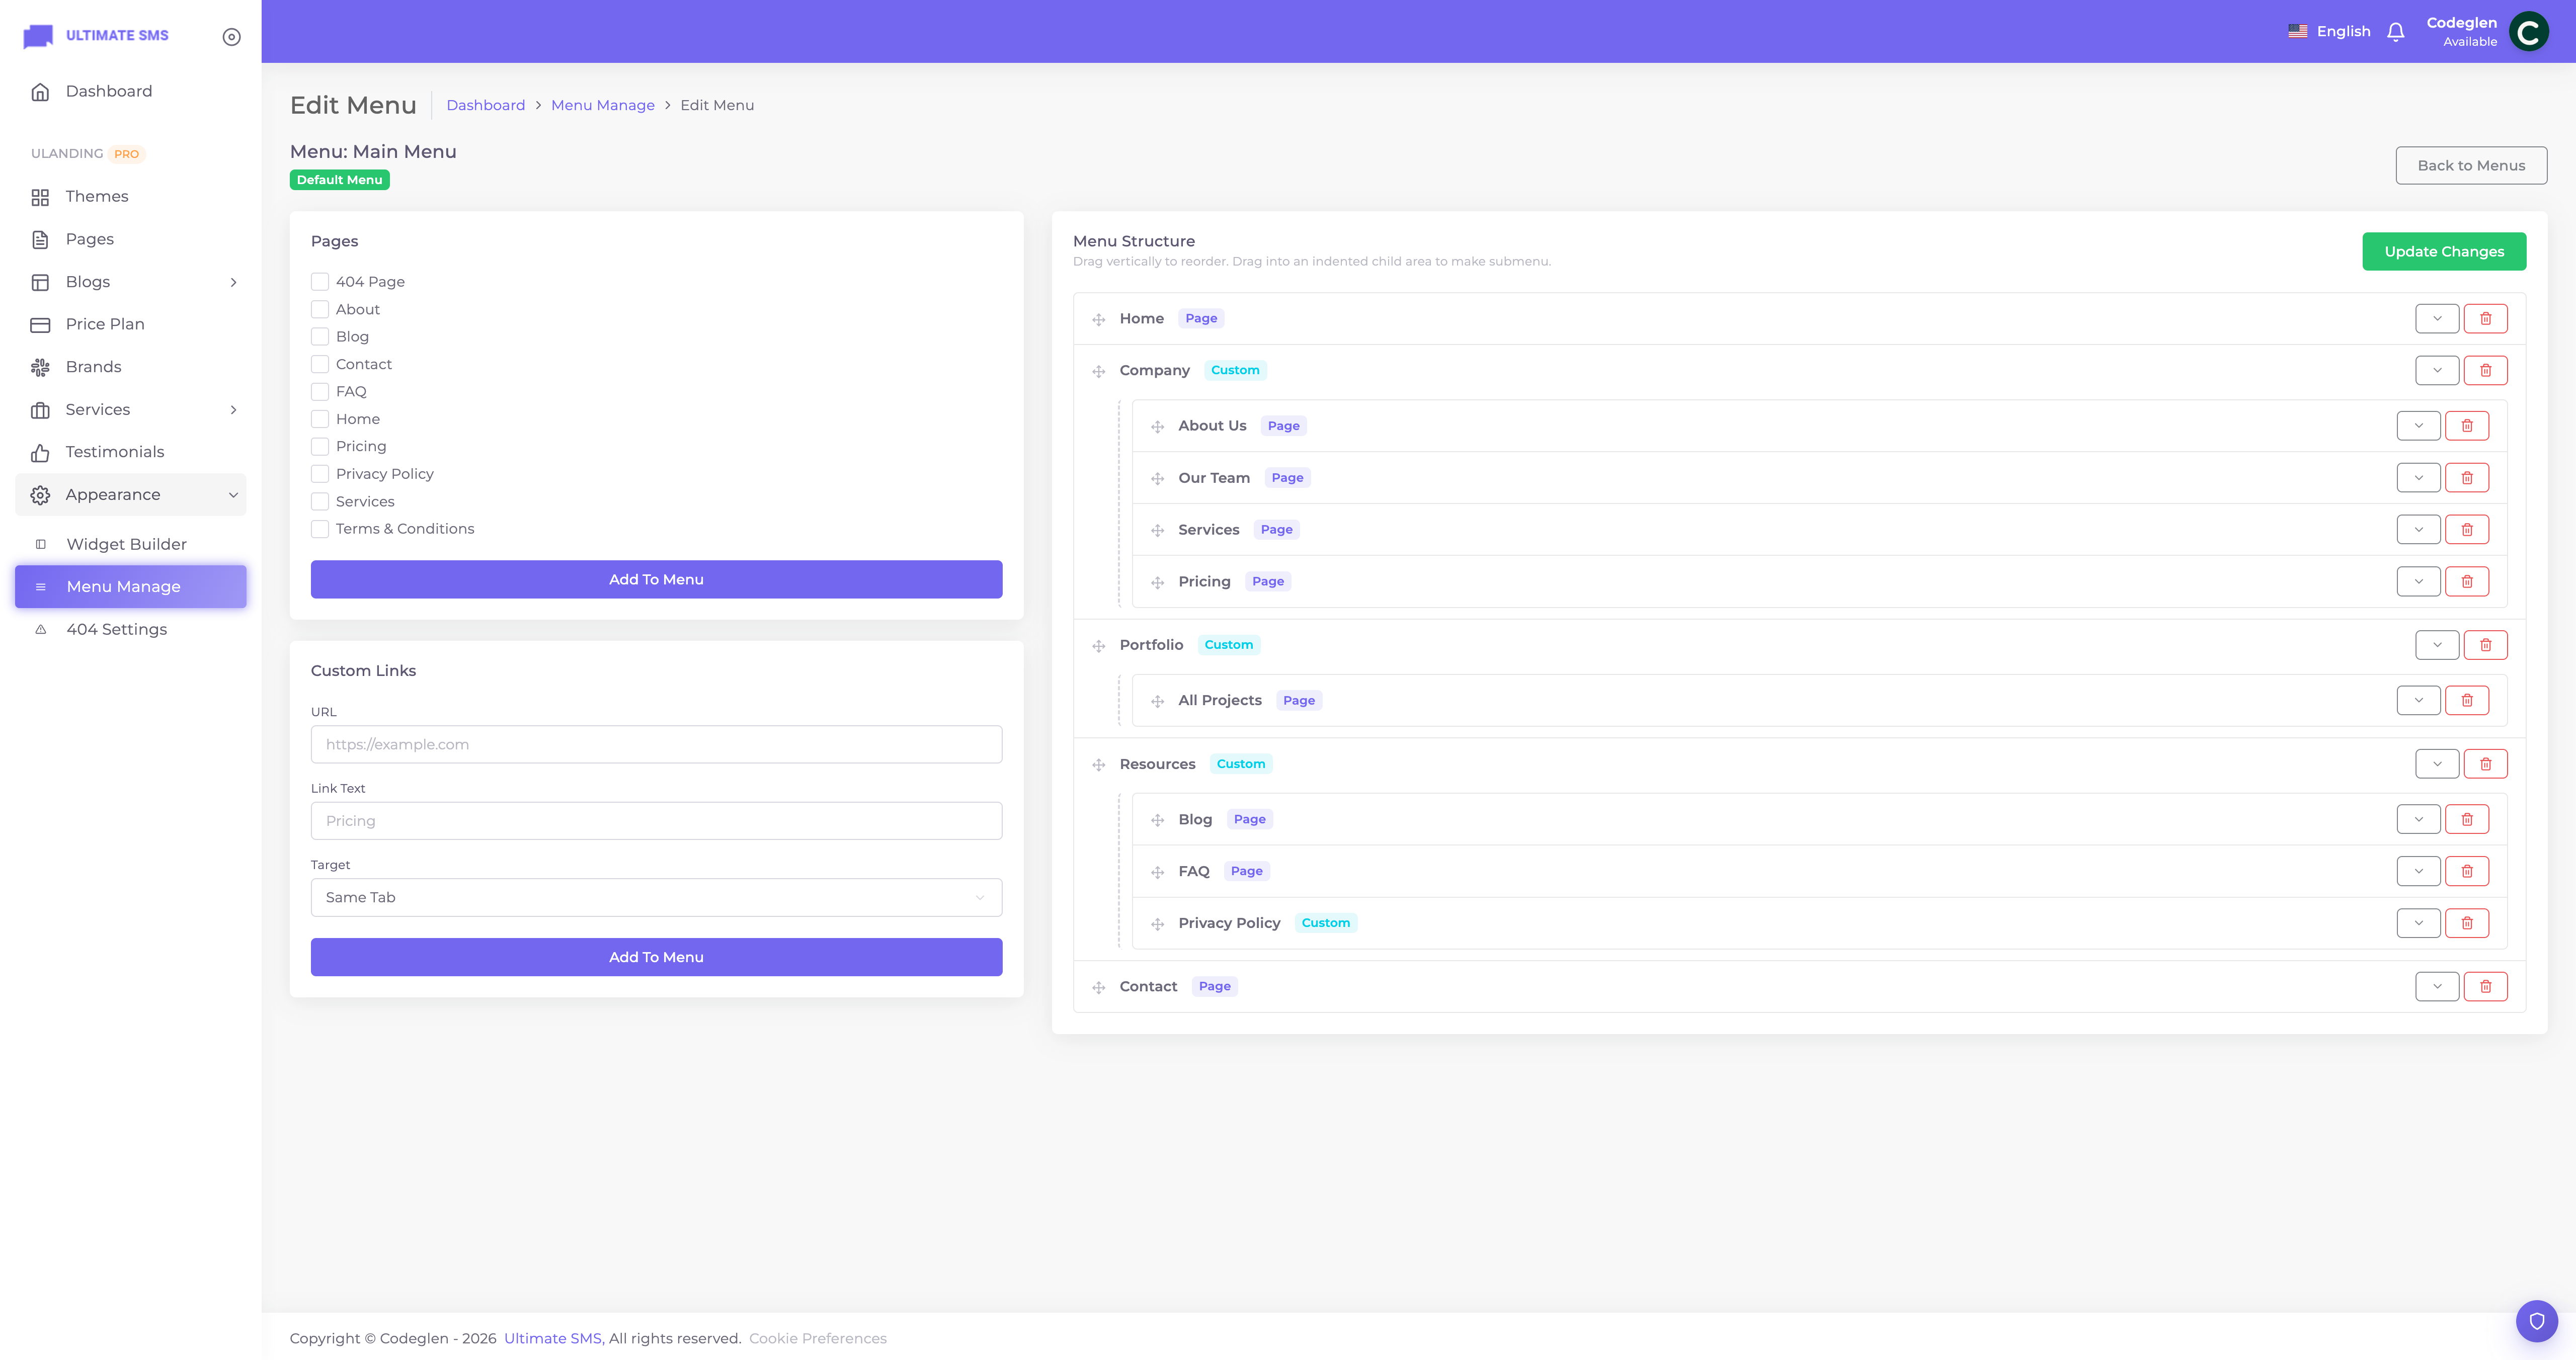
Screenshot: Drag‑and‑drop menu structure with nested dropdown items
Editing an item
Click an item to edit:
| Field | What it does |
|---|---|
| Title | The text shown in the menu. |
| URL | For custom links only. |
| Target | Same tab (_self) or new tab (_blank). |
Remove an item with its delete action.
Normal menu vs. mega menu
| Type | Description |
|---|---|
| Standard menu | A normal bar with simple dropdown submenus (created by nesting items). |
| Mega menu | Large, multi‑column dropdowns that can include icons, thumbnails, badges and a CTA. |
You choose standard vs. mega in Themes → Customizer → Menu. The mega menu's options (max columns, icons, thumbnails, badges, CTA) are set there too.
Note The mega menu is configured globally in the Customizer rather than per menu item. Icons and badges on individual items come from the theme/demo styling, not from the basic menu item fields.
Dropdowns
Create a dropdown by nesting items: drag a child item under a parent. The parent then shows a dropdown containing its children. Nest further for sub‑dropdowns where the theme supports it.
Authentication links (Sign In / Sign Up)
The Sign In and Sign Up buttons are not menu items — they're configured in Themes → Customizer → Header (text, URL, show/hide, styling). See Header.
Assigning menus
| Location | How to assign |
|---|---|
| Header (main navigation) | Set the menu as default. The header always uses the default menu. Control how it displays (Standard / Mega / Off‑canvas) in Themes → Customizer → Menu. |
| Footer | Open the Widget Builder, edit the footer area, add a Menu widget, and select the menu. |
| Blog sidebar | Same Widget Builder flow, using the blog sidebar area + Menu widget. |
Tip Create separate menus (e.g. “Main”, “Footer Legal”) and assign them with the Menu widget for footers — don’t overload your header default menu with legal links.
Setting the default menu
Mark a menu as default to use it as your site's main navigation (header).
How menu links resolve
- A page item links to that page's URL (the home page links to
/). - The special
blogslug links to your blog archive. - A custom item links to whatever URL you set (absolute URLs are kept as‑is).
Best practices
- Keep the top level short — 5–7 items maximum.
- Group related pages into dropdowns/mega menus.
- Put your most important link last (often a CTA button).
- Match link text to page titles so visitors aren't confused.
Troubleshooting
| Problem | Fix |
|---|---|
| Menu not showing | Make sure a menu is set as default. |
| Dropdown not appearing | Nest child items under a parent. |
| Mega menu looks like a normal menu | Set menu type to Mega in Customizer → Menu and enable the mega menu. |
| Sign In/Up missing | Configure them in Customizer → Header. |
| Footer menu empty | Add a Menu widget and select the menu. |
Continue to Media.