Quick Start Guide
This guide takes you from a blank installation to a complete, published website in about 30 minutes. Follow the steps in order. By the end you'll have a real site you can keep editing.
Tip The fastest path to a finished site is: Activate a theme → Import the demo → Edit the homepage → Publish. That's exactly what this guide does.
Before you start
Make sure:
- ✅ uLanding is installed and Active under Plugins → All Plugins (see Installation).
- ✅ You can see the ULANDING PRO menu group in your admin sidebar (Themes, Pages, Blogs, etc.).
- ✅ You're using a modern browser (Chrome, Firefox, Edge or Safari).
Step 1 — Activate a theme
The theme sets your site's overall style.
- In the admin sidebar, open Themes.
- Browse the 10 themes. Each card shows a preview image and a description.
- Click Preview on any theme to see a live demo in a new tab.
- When you've decided, click Activate on that theme's card.
The active theme is marked with Active and Live badges.
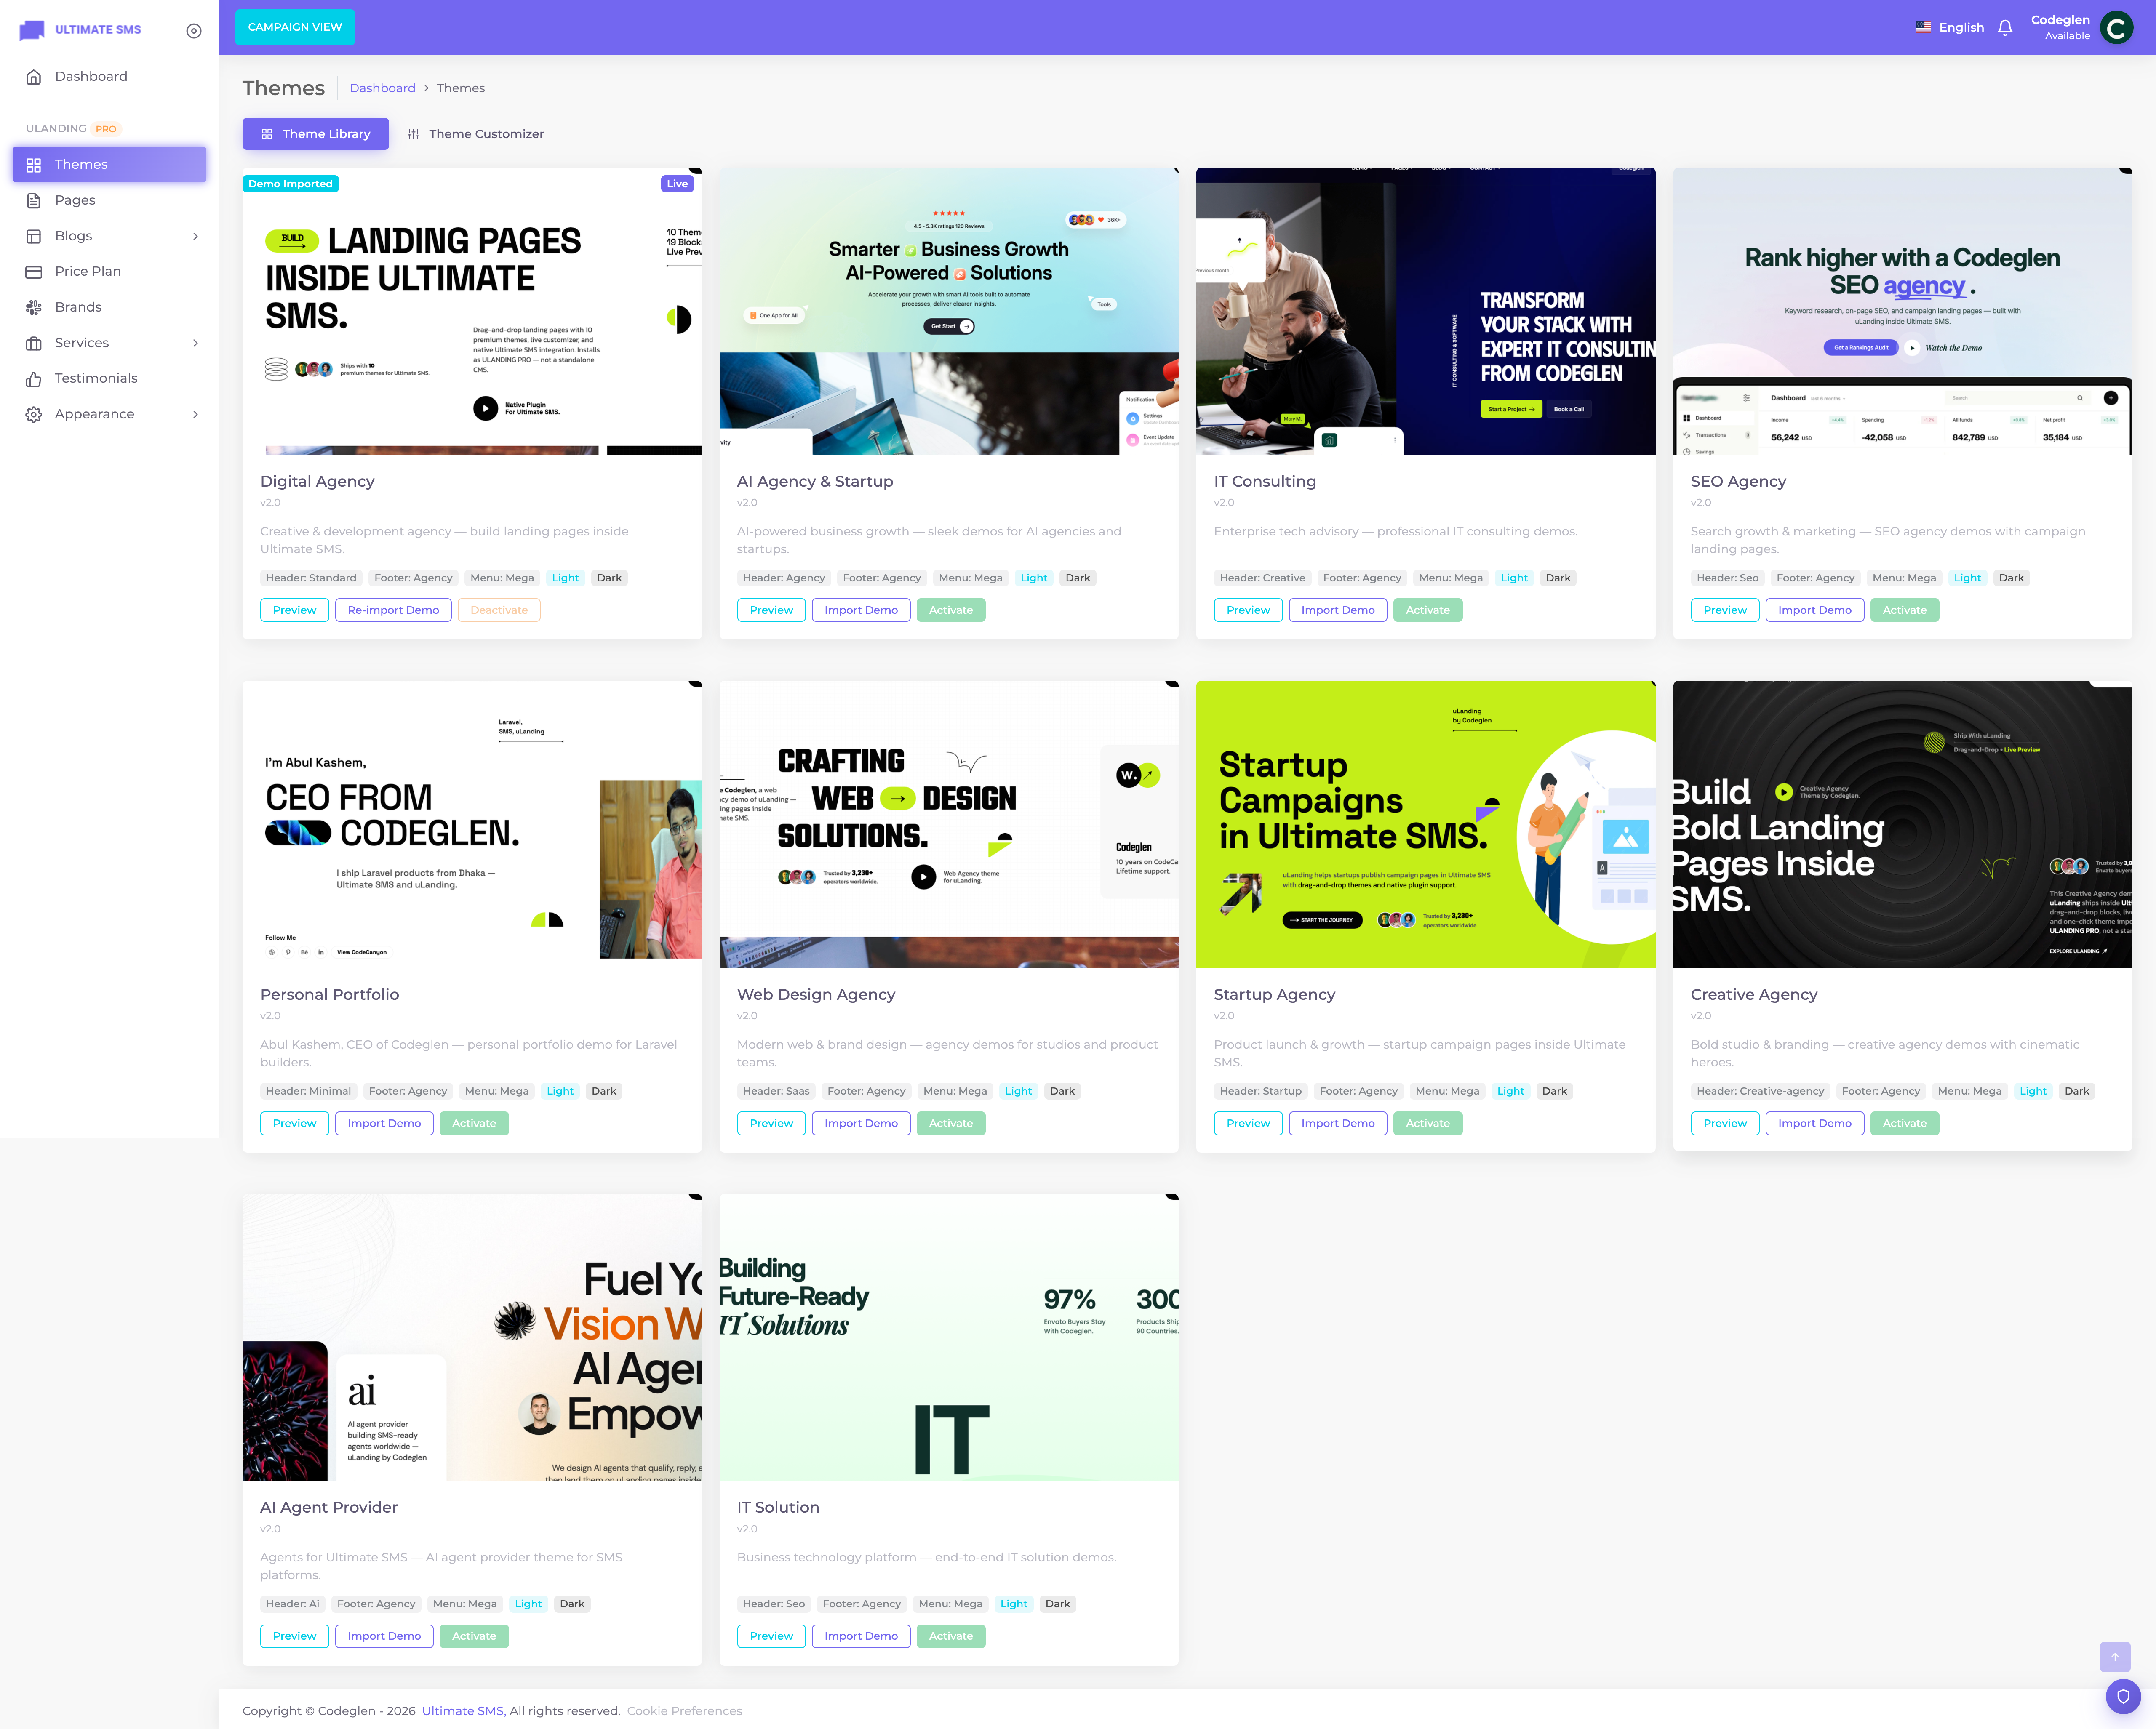
Screenshot: Appearance → Themes (theme library with Activate buttons)
Tip Not sure which to pick? Digital Agency is the friendly default and works for almost any business. You can change your theme later at any time.
Step 2 — Import the demo content
This is the magic step. Instead of starting from a blank page, you'll fill your site with a complete example you can edit.
- On your chosen theme's card, click Import Demo.
- A window appears listing everything that will be imported: - Theme settings & customizer settings - Pages (Home, About, Services, Pricing, Blog, Contact, Privacy, Terms, 404) - Services & service detail pages - Blog posts, categories & tags - Pricing plans - Testimonials & brand logos - Menus, footer widgets and the off‑canvas panel
- Click Import and wait a few moments.
When it finishes, the theme is activated, your homepage is set, and your site is full of realistic content.
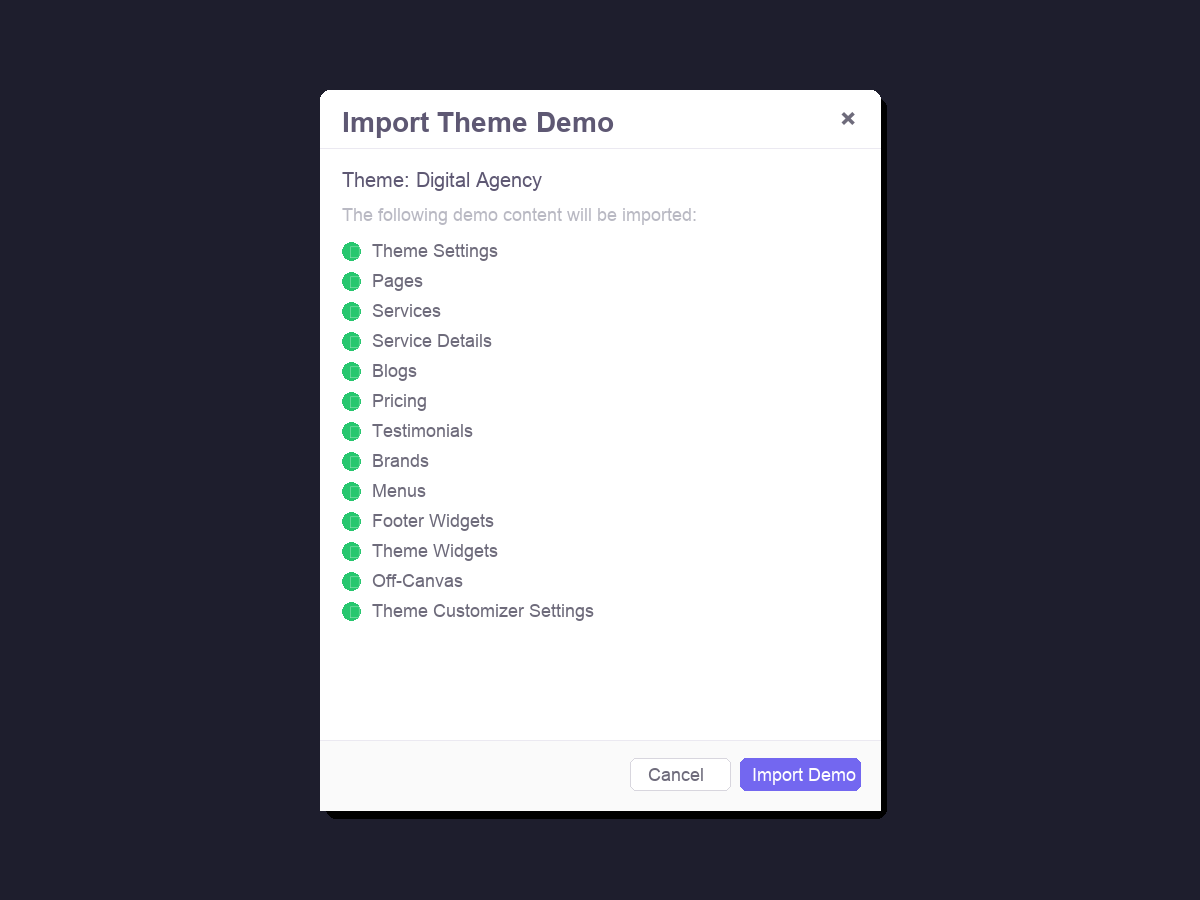
Screenshot: Theme Library → Import Demo confirmation window
Warning Importing demo content adds and updates demo items. If you've already created your own content with the same names, it may be overwritten. On a brand‑new site this is exactly what you want. See Demo Importer for details.
Step 3 — View your site
- Open a new browser tab and go to your site's main address (for example
https://yoursite.com). - You'll see a complete, professional homepage. 🎉
Take a moment to click around — the menu, the footer, the blog and the service pages all work already.
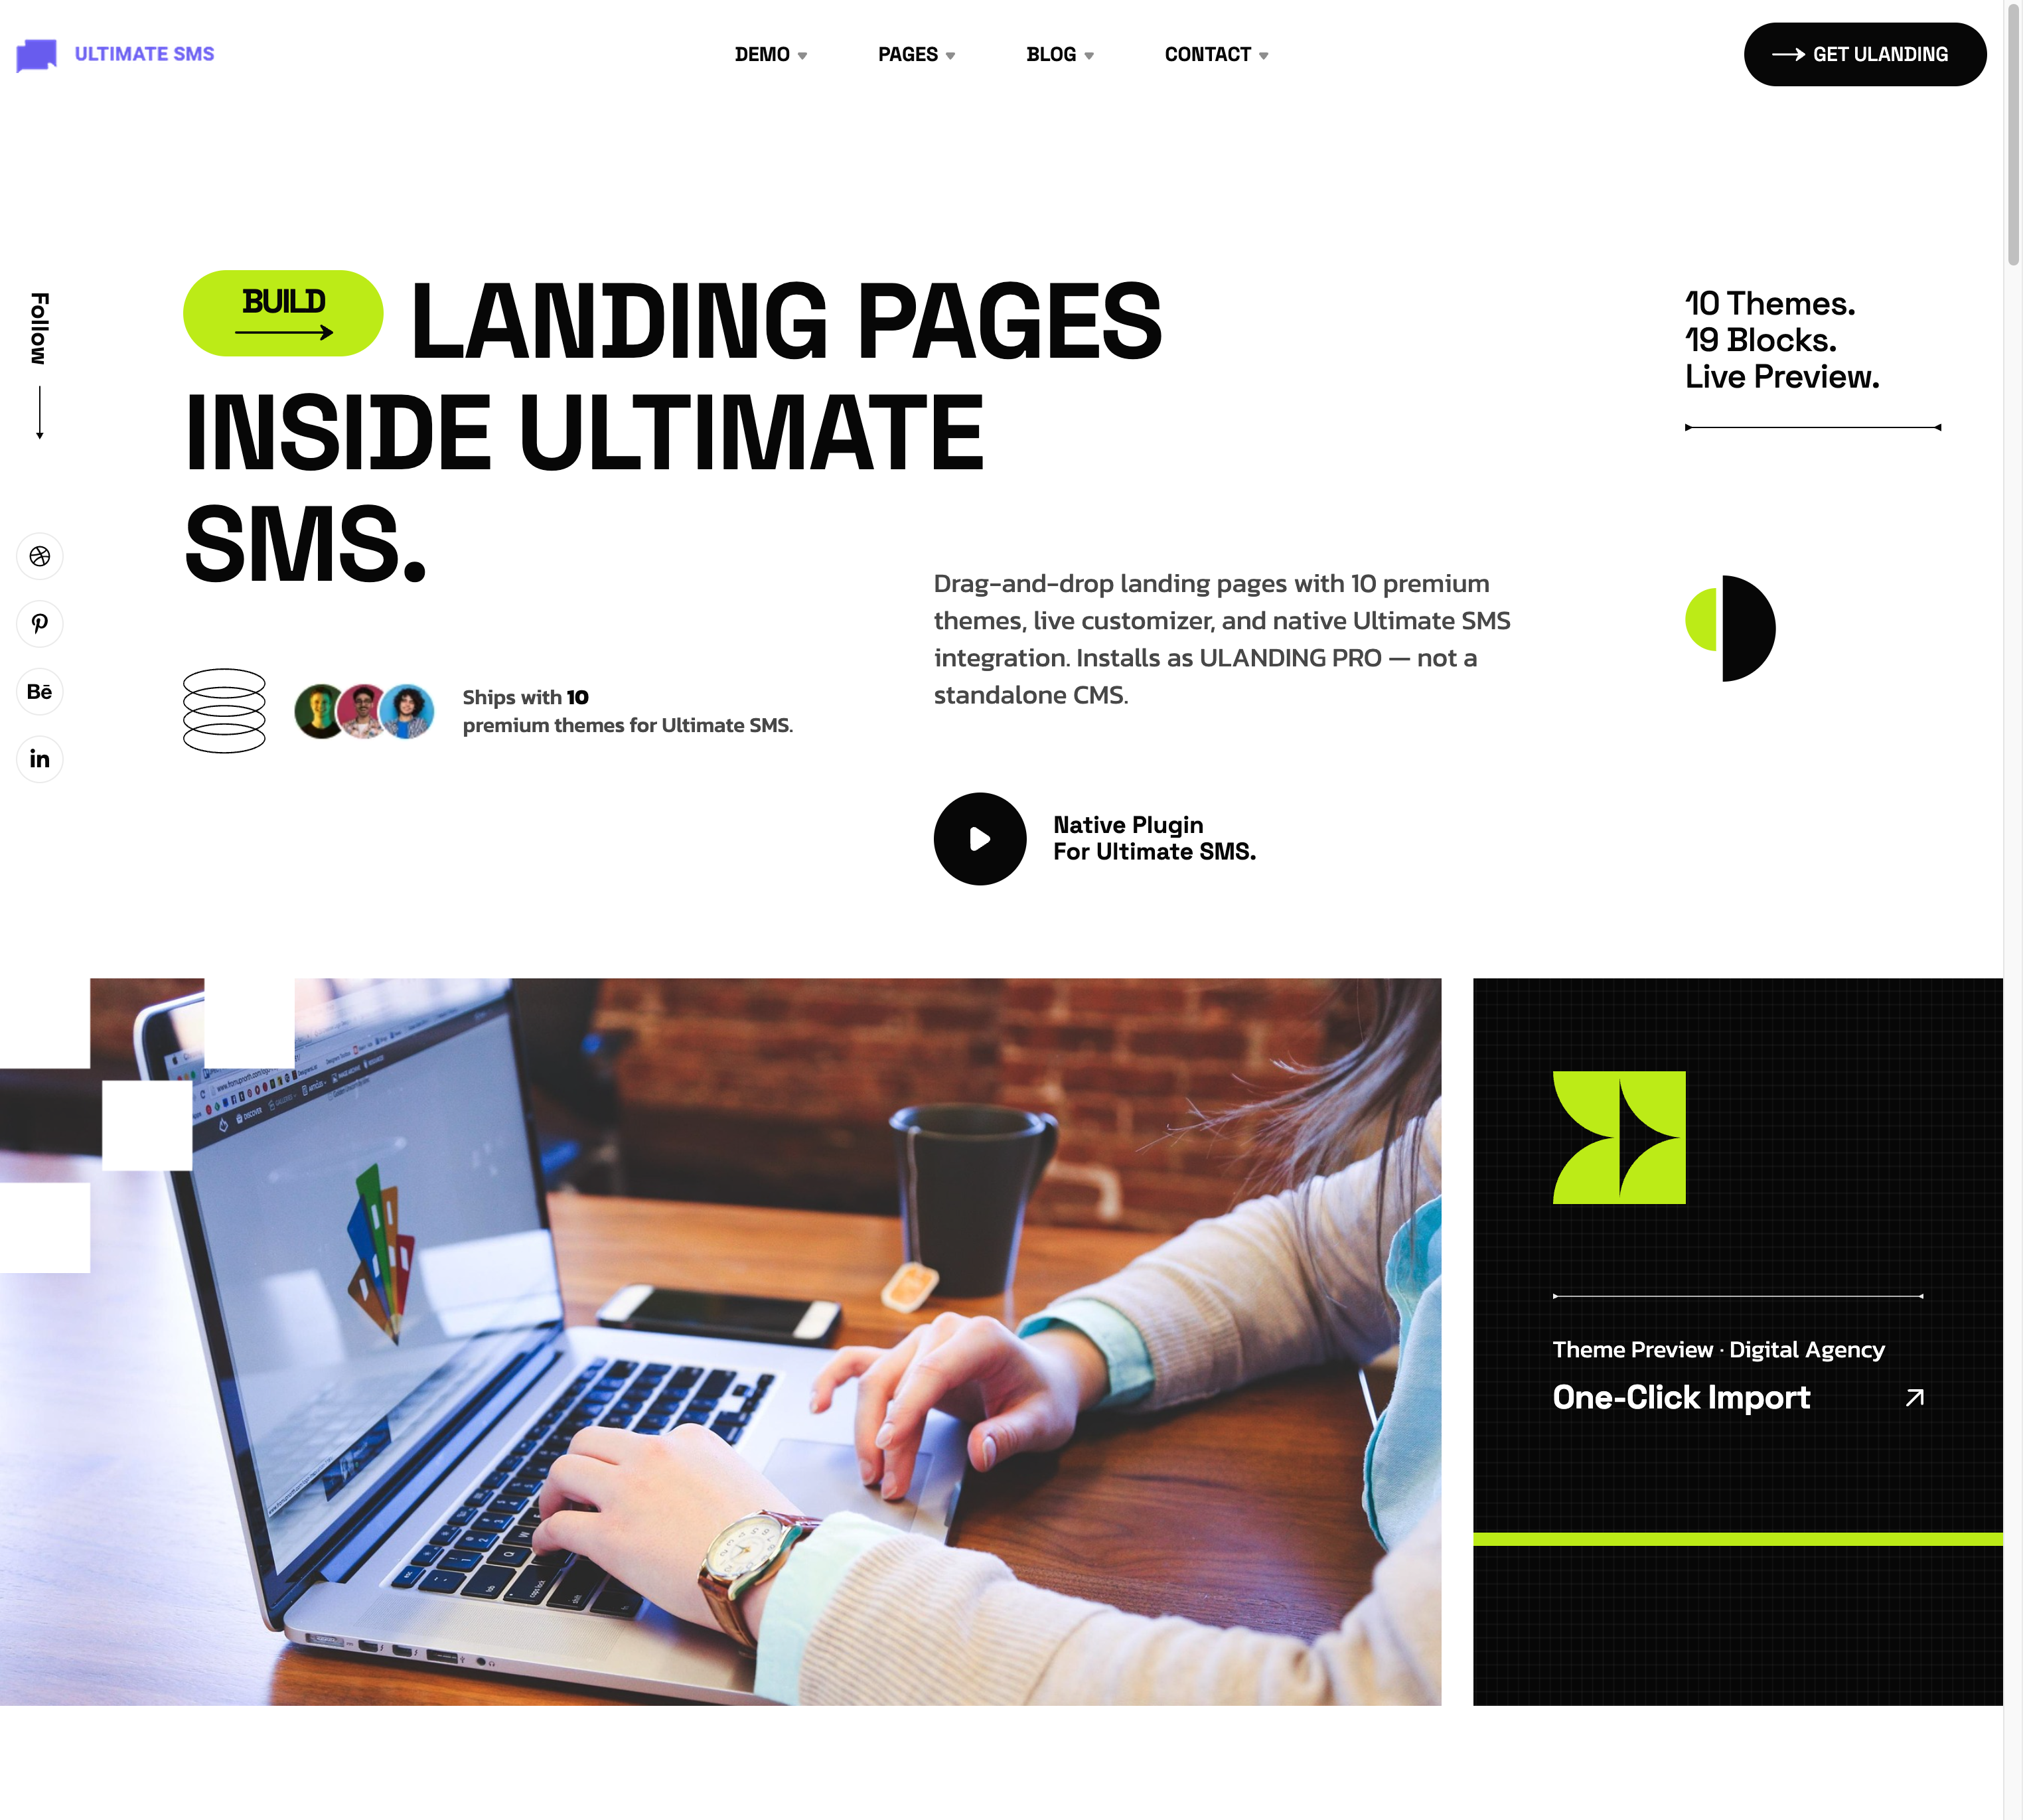
Screenshot: The imported demo homepage on the live site
Step 4 — Set your colors, logo and fonts
Now make it yours using the live customizer.
- Go to Themes → Customizer.
- The customizer opens with a live preview on one side and panels on the other.
- Start with these panels: - Branding — upload your logo, a dark logo (for dark backgrounds), and your favicon (the little browser‑tab icon). Set your site name. - Colors — set your primary color (your brand's main color). Watch the preview update instantly. - Typography — choose your heading and body fonts.
- Click Save when you're happy.
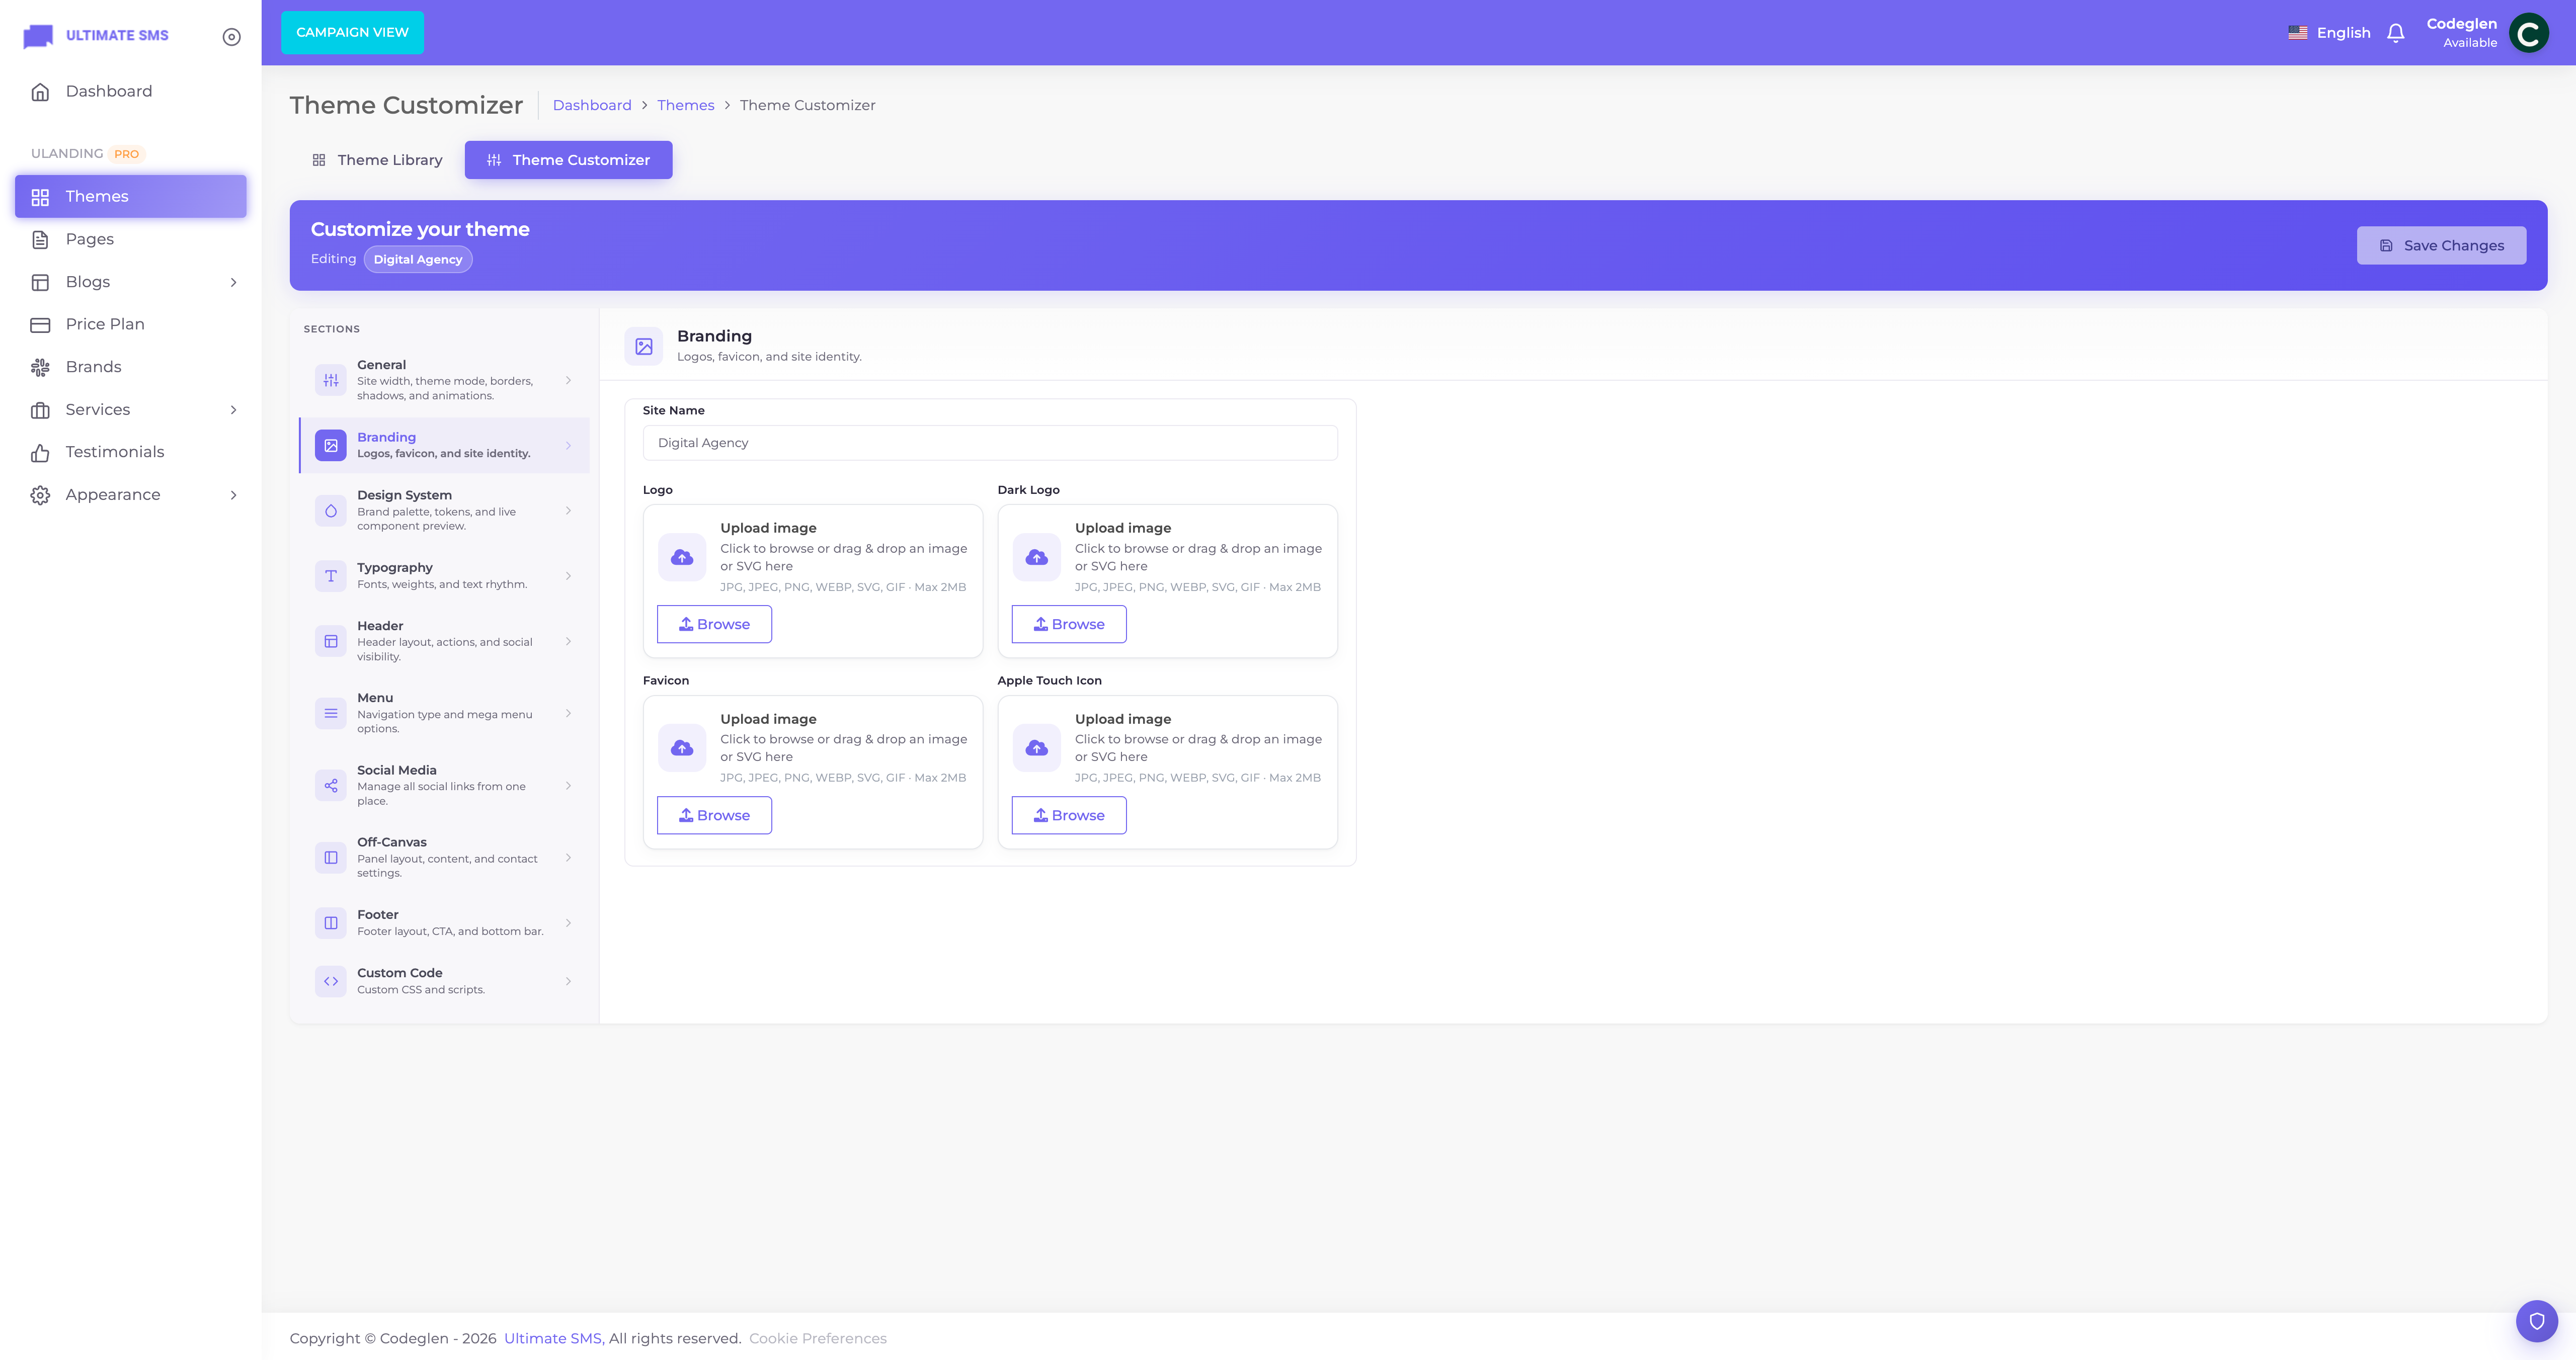
Screenshot: Themes → Customizer (Branding and Colors panels)
Tip Change one thing at a time and watch the live preview. It's the quickest way to learn what each setting does.
Full details: Theme Customizer.
Step 5 — Edit your homepage
Time to change the demo text and images to your own.
- Go to Pages.
- Find the Home page and click Edit, then open the Page Builder (or click the page builder link directly).
- The page builder shows your homepage as a stack of blocks (Hero, About, Services, Pricing, etc.) on the left, and a widget library on the right.
- Click a block to expand it, then change its text, images and links.
- Click Save on that block. Use Preview to check it first if you like.
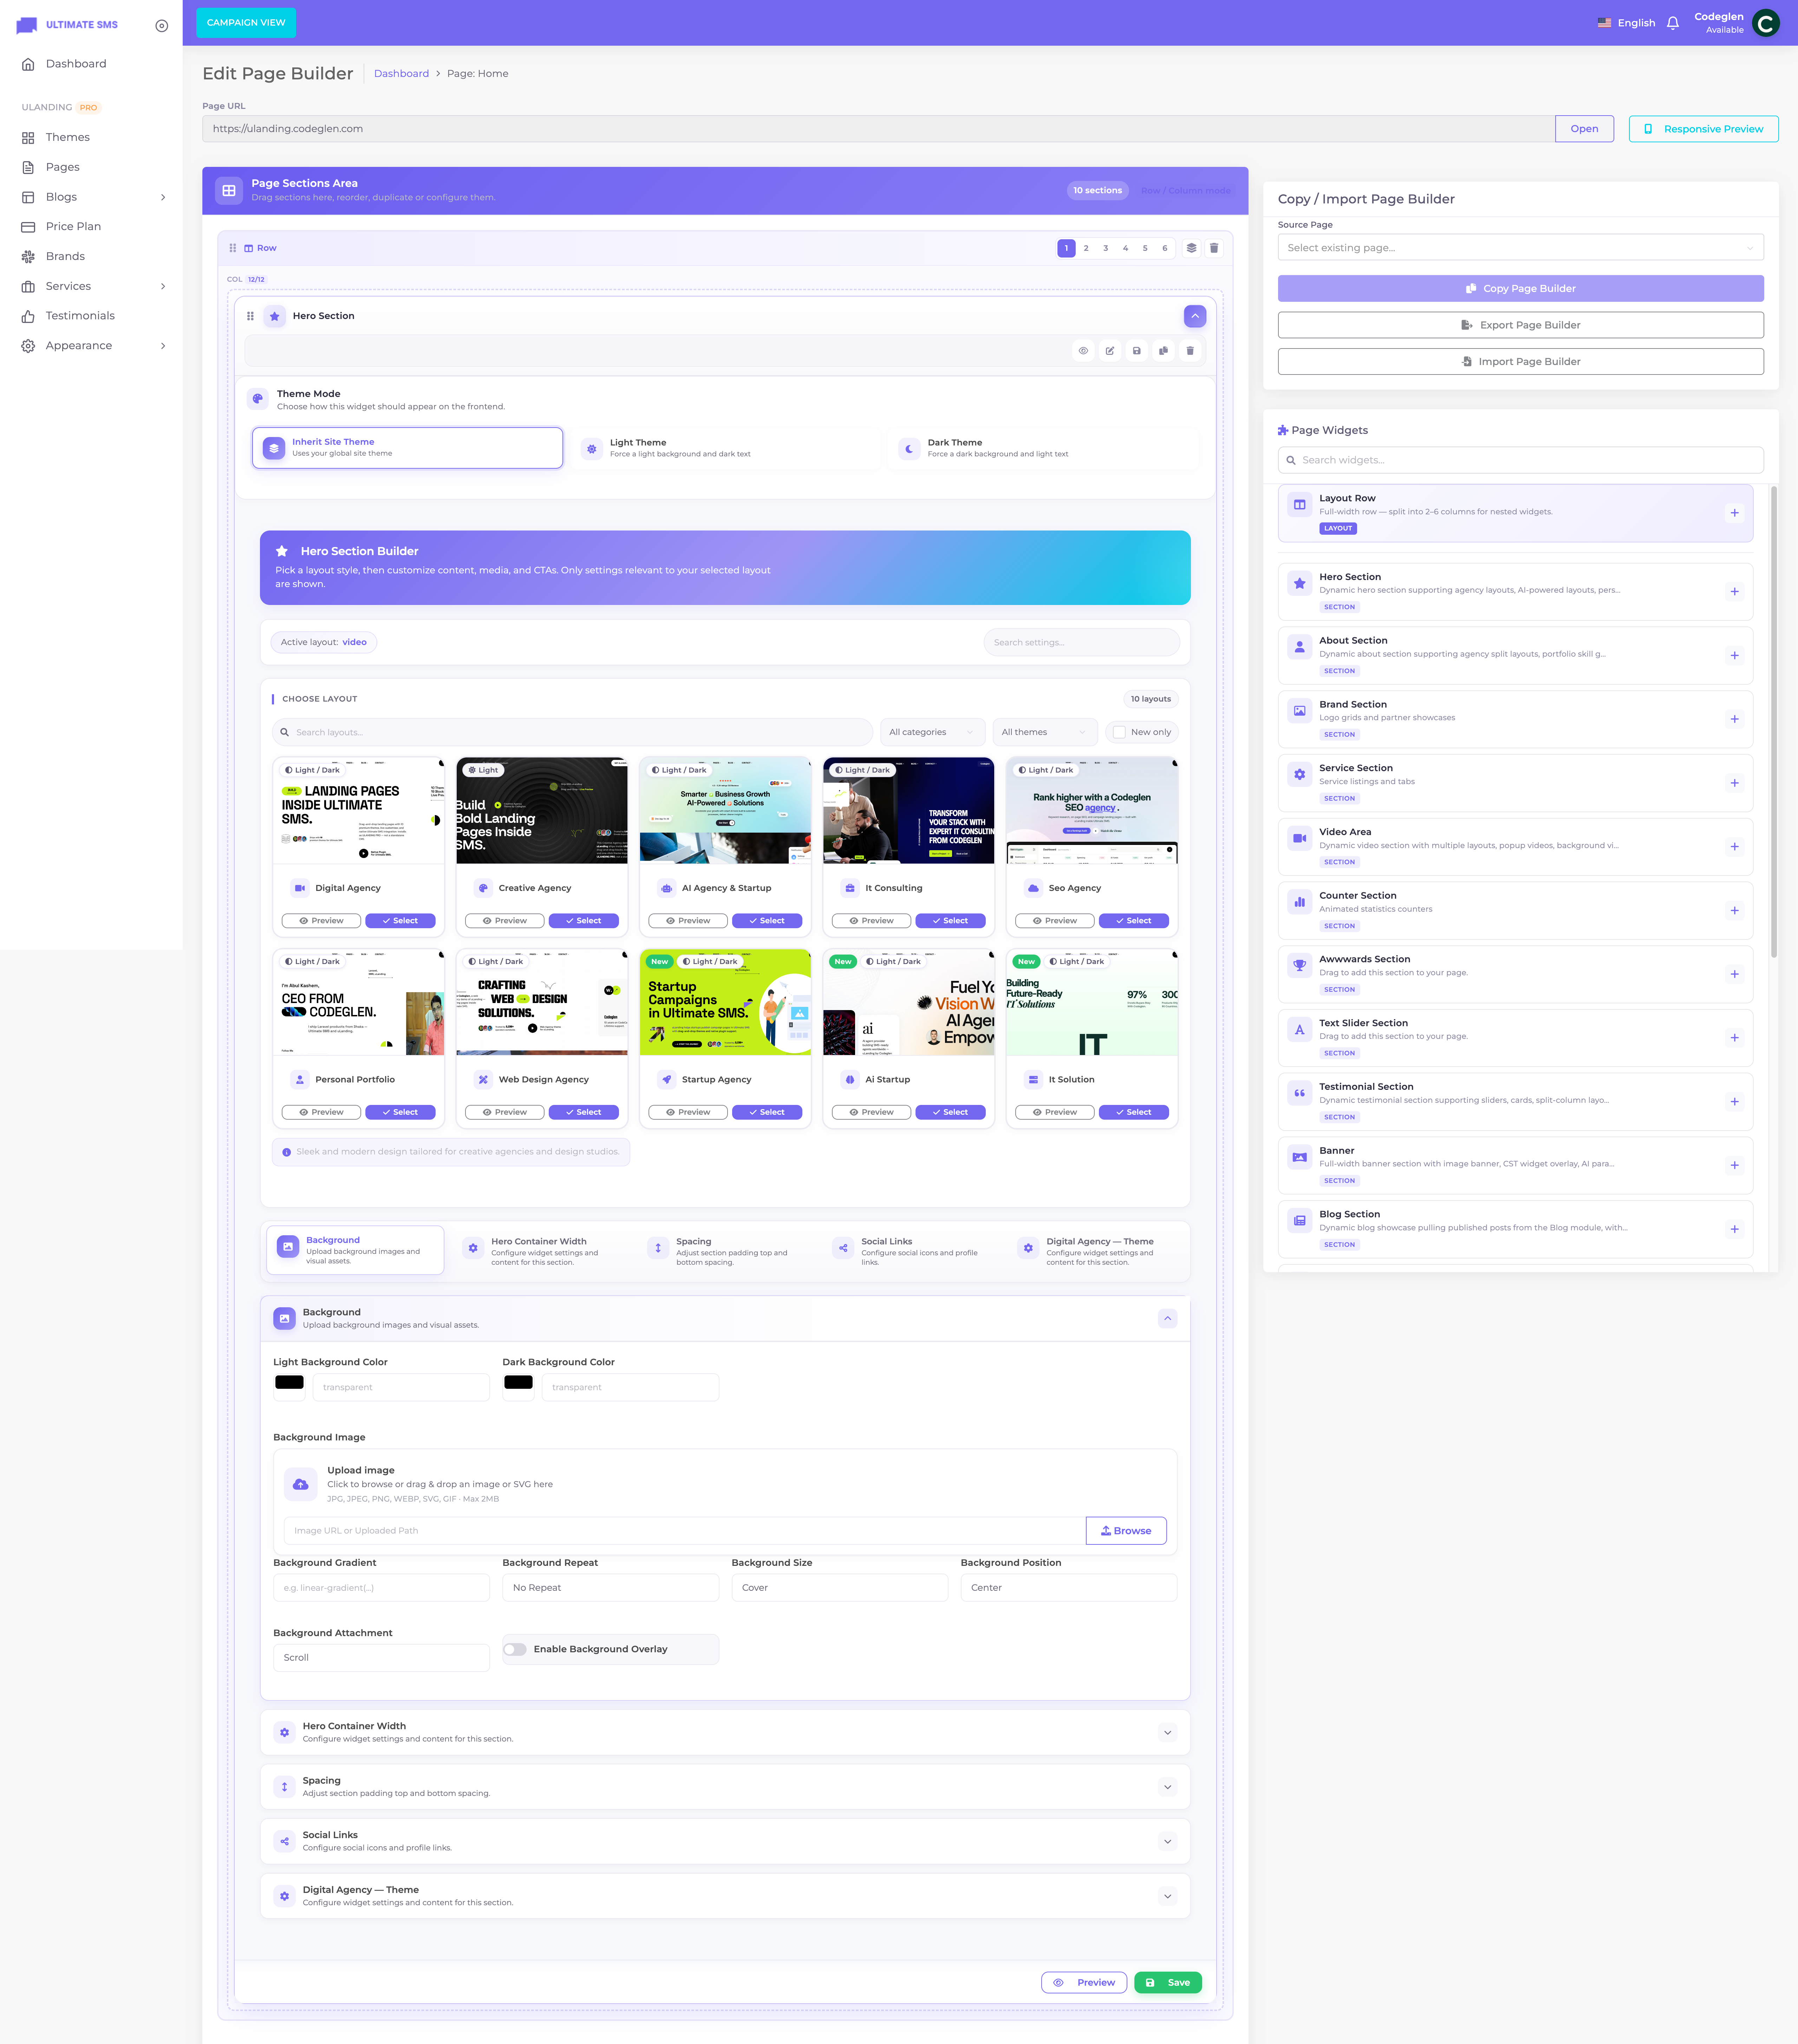
Screenshot: Page Builder editing the Hero block
Common first edits:
- Hero block — change the headline, description, and main button.
- About block — write a short paragraph about your business.
- Services block — this pulls from your Services content (Step 6).
- CTA block — set your main call‑to‑action and contact link.
Full details: Page Builder.
Step 6 — Update your real content
Replace the demo data with your own:
| Update… | Where |
|---|---|
| Your services | Services → edit each service |
| Your blog posts | Blogs → edit or add posts |
| Your pricing | Price Plan → edit each plan |
| Customer reviews | Testimonials |
| Client logos | Brands |
| Your navigation menu | Appearance → Menu Manage |
You don't have to do all of these at once. Update the ones that matter most first (usually Services and Pricing).
Step 7 — Build your footer
- Go to Appearance → Widget Builder.
- The Footer area shows widgets arranged in columns.
- Edit the demo widgets (logo, links, contact info, newsletter) to use your details, or drag new widgets from the library.
- Click Save and use Preview to check.
Full details: Widget Builder.
Step 8 — Add your contact details & social links
- Go to Themes → Customizer.
- Social panel — add your Facebook, Instagram, LinkedIn, etc.
- Header panel — set your top‑bar phone/email and your call‑to‑action button.
- Off‑Canvas panel — set the contact info and working hours shown in the slide‑in menu.
- Save.
Step 9 — Check it on mobile
- In the Page Builder, click the Responsive Preview toggle to preview phone and tablet sizes.
- Or simply open your live site on your phone.
uLanding is responsive by default, so it should already look great. If anything looks off, see Responsive Design.
Step 10 — Publish
Your site is already live for any content marked Published. To make sure everything is visible:
- In Pages, confirm each page you want public is set to Published (not Draft).
- In Services, Blogs, Price Plan, Testimonials and Brands, confirm items are Published / Active / Visible.
That's it — your website is live! 🚀
What to do next
- Fine‑tune your design: Theme Customizer
- Learn every block in depth: Page Builder Widgets
- Improve your Google ranking: SEO
- Translate your site: Localization
Quick Start checklist
- [ ] Activate a theme
- [ ] Import demo content
- [ ] Set logo, colors and fonts (Customizer)
- [ ] Edit the homepage (Page Builder)
- [ ] Add your services & pricing
- [ ] Build your footer
- [ ] Add contact details & social links
- [ ] Check on mobile
- [ ] Publish everything